Замена головки блока цилиндров своими руками: подробные инструкции и меры предосторожности
Дата выпуска: 06.12.2025
Оглавление
Замена всей головки блока цилиндров — сложная задача по ремонту автомобилей, которая обычно требует определенных механических знаний и опыта. Независимо от того, нужно ли улучшить характеристики двигателя или устранить такие проблемы, как износ или повреждение головки блока цилиндров, понимание процесса замены и мер предосторожности имеет решающее значение для успешного выполнения этой работы. Makewed предоставит подробное руководство по самостоятельной замене всей головки блока цилиндров и предложит несколько практических советов, которые помогут вам успешно заменить головку блока цилиндров, обеспечив при этом долгосрочную стабильность и надежность двигателя.
Подготовка к замене всей головки блока цилиндров.
Перед началом замены головка блока цилиндров в сбореДля этого вам понадобятся следующие инструменты и материалы:
В сборе головка блока цилиндров (выберите подходящий материал: алюминиевый сплав или чугун, в зависимости от модели автомобиля).
Основные инструменты, такие как гаечные ключи и отвертки.
Смазка или герметик
Динамометрический ключ (для обеспечения правильного усилия затяжки болта)
Руководство по ремонту автомобилей (для получения подробной информации в соответствии с моделью автомобиля)
Новая прокладка головки блока цилиндров и болты головки блока цилиндров.
При выборе головки блока цилиндров для замены старой убедитесь, что она долговечна и комплектна, особенно в высокопроизводительных двигателях, где качество имеет первостепенное значение.
Отсоедините аккумулятор и снимите крышку двигателя.
Перед началом любых ремонтных работ убедитесь, что аккумулятор автомобиля отключен, чтобы предотвратить несчастные случаи. Затем откройте и снимите крышку двигателя, чтобы обеспечить достаточно места для дальнейших работ.
Слейте охлаждающую жидкость и моторное масло.
При замене всей головки блока цилиндров необходимо слить охлаждающую жидкость и моторное масло. Это связано с необходимостью демонтажа компонентов, относящихся к системе охлаждения и маслопроводам. Перед сливом подготовьте соответствующие емкости для безопасного сбора этих жидкостей.
Снимите аксессуары и приспособления.
В зависимости от модели вашего автомобиля, снимите все навесные детали, относящиеся к головке блока цилиндров, такие как впускной коллектор, выпускной коллектор, система зажигания, топливопроводы и т. д. Не забудьте сделать пометки и фотографии во время разборки, чтобы избежать путаницы при сборке.
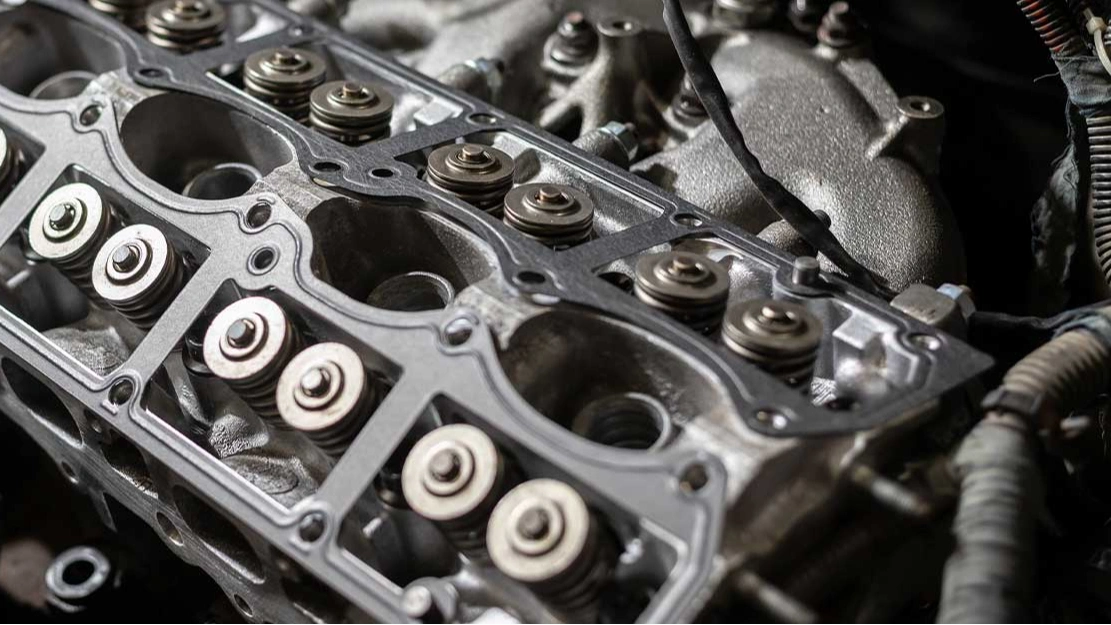
Снимите старую головку блока цилиндров в сборе.
Используйте гаечный ключ, чтобы поочередно ослабить болты головки блока цилиндров. Эти болты могут располагаться в разных местах, и их необходимо ослаблять в правильном порядке. Обязательно используйте динамометрический ключ, чтобы обеспечить равномерное ослабление каждого болта. В процессе снятия, если вы столкнетесь с заеданием, вы можете слегка постучать по головке блока цилиндров, чтобы помочь ослабить болт.
Очистка контактных поверхностей
Перед установкой новой головки блока цилиндров в сборе очистите блок цилиндров и сопрягаемые поверхности, убедившись в отсутствии загрязнений или остатков старой прокладки. Этот шаг крайне важен для эффективного предотвращения утечек масла или воздуха.
Установка новой головки блока цилиндров в сборе.
Аккуратно установите новую головку блока цилиндров в сборе на блок цилиндров. На этом этапе убедитесь, что вы используете новую прокладку головки блока цилиндров и что она правильно выровнена. Во время установки затягивайте болты головки блока цилиндров последовательно, при этом каждый болт должен быть затянут с указанным моментом затяжки с помощью динамометрического ключа. Недостаточный момент затяжки может привести к ослаблению головки блока цилиндров, а чрезмерная затяжка может повредить головку блока цилиндров или двигатель.
Повторная установка аксессуаров
После установки установите на место все ранее снятые детали и комплектующие, такие как система впуска, выхлопная система, система зажигания и т. д., в обратном порядке снятия. Убедитесь, что каждый компонент надежно закреплен, чтобы предотвратить утечки воздуха или масла.
Долив охлаждающей жидкости и моторного масла.
После установки головки блока цилиндров долейте охлаждающую жидкость и моторное масло. Убедитесь, что уровни жидкостей находятся в пределах нормы, чтобы предотвратить перегрев двигателя или износ из-за недостатка жидкости.
Запуск двигателя и проверка
Наконец, запустите двигатель и внимательно прислушайтесь к любым необычным звукам. Проверьте наличие утечек и убедитесь, что головка блока цилиндров установлена правильно и двигатель работает плавно. Если все в порядке, поздравляем с успешной заменой всей головки блока цилиндров.
Меры предосторожности
Выберите высококачественная головка блока цилиндров в сборе: При выборе между цельнометаллической и чугунной головкой блока цилиндров убедитесь, что она произведена надежным поставщиком и соответствует требованиям к производительности двигателя.
Точная установка: Убедитесь, что все болты затянуты равномерно, чтобы избежать повреждения головки блока цилиндров из-за неравномерного давления.
Проверка системы охлаждения: Поскольку в процессе замены используется охлаждающая жидкость, обязательно проверьте исправность системы охлаждения после установки, чтобы предотвратить перегрев двигателя.
Краткое содержание
Самостоятельная замена всей головки блока цилиндров — сложная задача, но для автовладельцев с некоторым опытом ремонта автомобилей она может быть успешно выполнена при соблюдении подробных инструкций и тщательной подготовке. Выбор подходящей и прочная головка блока цилиндров в сборе Внимание к деталям поможет повысить эффективность двигателя и его долгосрочную надежность. Будь то полная головка блока цилиндров или стандартная головка, обе требуют точной установки и тщательного обслуживания, чтобы обеспечить оптимальную работу двигателя.